Friday, August 31, 2012

Junky Inspiration: The Evolution of Fashion


I was inspired today!I was thinking about fashion and beauty from many different angles. I went into the past to see how women in the 50's, 60's and 70's used fashion and beauty to their advantage. Its crazy how so many ideas, trends and inspirations have been mimicked into modern time. The teased hair, smokey eye, nude lip and highlighted facial features (can we say contour at its best). Old school has become the New school look. 

I located this 1960's inspired Beauty Glam Photo that depicted all that I would think a 1960's women of fashion would resemble. I did it some justice by displaying the look, feel and attitude from back then into now. The Evolution has been Bloggified!!!!!!!!!!!!
This is not my photo


For this shoot, I wanted to use new products that I purchased from ELF. The Elf cosmetic line had everything I needed. From the volume plumping mascara, cream eyeliner and eyeliner shadow stick to the contour blush and bronzing power and the eye shadow palette.  It made this look almost easy! This line is GREAT and affordable. Product prices range from $1 to $6, CANT BEAT THAT! I will definitely keep this line in my "on the go" cosmetic bag!


I hope you all try this line. The website is having a BUY ONE GET ONE FREE SALE UNTIL 9/2. You wont be disappointed. Thanks for viewing!!!

Posted by Jeri


Wednesday, August 29, 2012

Junky DIY: Monogram Lotion Pump

I was lucky enough to find this amazing seller on etsy by the name of GS Monograms that did very affordable monograms on vinyl. You have the option to choose between several different styles and colors, needless to say, I was in D.I.Y heaven. I was overwhelmed with ideas as to what I could do with the decal once I received it. Since, it was my first time making a transaction with the seller and not really knowing what the quality was going to be, I only ordered one (boy am I kicking myself now) monogram decal at the price of $3.75. Doing business with the seller was a breeze! Once my purchase was complete and it took about a week for the monogram decal to get to me.  Awaiting its arrival gave me just the right amount of time to finalize my plans for that bad boy.
 
I chose to monogram a lotion pump. Sounds dull I know, but wait until you see it later. Smelling good is a priority, just like the next girl, but I also like things to be pretty and unique. We all know that when it comes to purchasing lotion it's tough to find a bottle that is really appealing to the eye, and also smells good. I know, I know #girlproblems. What can I say, Lotion Pumpin' aint easy!

Anyways, I wanted to make something that I could leave out on my vanity or bathroom counter and not feel like I needed to hide it under the sink. Lord knows I would never find it again if I put it under there. Thats where all the other lotions and beauty chotchkies go to die. I couldn't bare another fatality.
THE CHALLENGE: I gave myself the challege of doing a D.I.Y at the cost of $5 or less, so I headed straight to my local dollar store to find the perfect container to put my lotion in. Pickins' were slim, but I managed to do it at the total cost of $4.80 with tax (including the decal of course). Well anywho, here is what the final product looked like. ENJOY!

Junky DIY: Monogram Lotion Pump

This is what the decal looked like when I first opened the envelope and the GS Monogram business card
 

The "lotion pump" aka soap dispenser I found at the dollar store. I cleaneed the surface before I placed the decal on the pump
 

I peeled the backing off the decal and then I centered the decal in the middle pressing firmly

Then I used something hard (that's what she said) to press all the letters onto the surfce of the pump

Then I gently peeled back the top layer of the decal


All done peeling

Then I went for the blow dryer to make sure that puppy stays put.


I applied heat to the decal for about 30 seconds


DIY Monogram, DIY bathroom organization, DIY makeup brush holder
Tadaaaaaaa!!!! The final product! Hope you try this at home.


 Posted by Ashley

Junky Style: City Girls

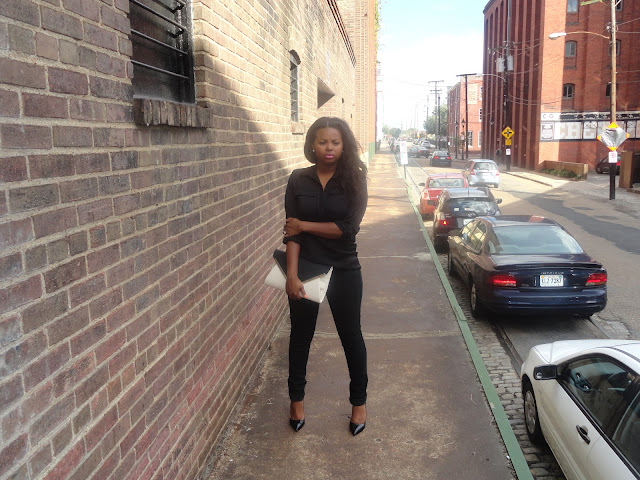
As fashion junkies, we love taking pictures in the moment. For this photo sesh we chose our home town, Richmond, as our canvas. We love Richmond for the exposed brick, elaborate artistic designs (in most cases graffiti),the buzzing sounds of bar-goers, beeping horns, and the historical back drop. After all, anywhere other than here wouldn't be home. Here we are, FJU and a piece or two of Richmond........

How to dress monochoromatic, When is Zara's sale, fashion.junkies.united, Richmond, VA, H&M skinny jeans


(Caught in the moment)


Ashley's Look:
Blouse: Target (similar here)//jeans: H&M (here)//clutch: Forever21 (similar here)//shoes: Zara (here)//sunnies:random(similar here)//jewelry:Nordstrom (here)

Jeri's Look: 
Romper: Express (similar here)//Shoes: Urban Outfitters (the same here)
Jacket:Thrift Store//Cardigan: J.Crew (similar here)//Assessories: H&M

by Ashley & Jeri

Tuesday, August 28, 2012

Junky Inspiration: Alexander McQueen Fall 2012


Pinned Image, Fall 2012 Clothing Trends, New York Fashion Week 2012, Who is Alexander McQeen, Ashley Reynolds, sequinsloveandglam, jfashion1, McQeen, Lyst.com
source:iamnasyareena, tumblr/Alexander McQueen


  Is this not enough to make your mouth water for all this McQeen this season?


Monday, August 27, 2012

Junky Life: My Life According to My Iphone

I always find it interesting to see what people find important/interesting enough to capture in their iphone. Here are my most recent phots captured. Enjoy!


Junky Life: My Life According to My Iphone

1. Gold Boat Shoes that I snagged at Target on Clearnace!!
2. A LOL moment, describes me completely!
3.  A Cup of Joe at my favorite Cuban spot, Kuba Kuba. Brunch with my hubby is always great!
4. DIY, free iphone monogram wallpaper
5. Mini photo shoot as I was prepping to go out for my friends bday bash.

6. Stalking June Ambrose on Instagram, as you do when you are a fashion junky.
7. Starbucks Gold Memeber for another year.

Whats on your smartphone? Share with us!


Ashley

Sunday, August 26, 2012

Junky Translations: Interior Design to Fashion Design

Junky Translations: Interior Design to Fashion Design
How to incorporate a bright color in your home, How to Decorate a Dining room
(this picture is not my own)


How to wear neon, H&M neon pants, J.Crew garment dyed pants
(photo taken by: my hubs)
            pants:H&M//nude wedges:Forever21//Top:French Connection//Necklace:Vera Wang// Pave Studs:Nordstrom

 Interior Design is catalyst when it comes to choosing different color combinations to wear, at least for me anyway. Although there should be very few rules when it comes to fashion other than to BE YOURSELF. Interior deign and fashion use many of the same guidelines when choosing patterns, texture, and color. I "dress" my home the same way I dress myself. I don't like anything to matchy matchy; I like balance, choosing complimentary colors, and mixing different textures in my design options.

 The photo above inspired me to use the color palette for my look today. For this particular interior design, I loved the bright pop of neon pink (my pants) and the neutralizing effect the gray had on the room (my top). The transparency of the lighting option the designer choose made me think of the pave stones in the earrings and necklace I chose for this casual look. Lastly, of course the wedges were the anchor of the look much like the dining room table.  Do you see it? Hope you like my translation from interior design to fashion design. 

 If you want to try choosing an interior design photo and translating it into a look, email your photo to fashionjunkiesunited@gmail.com. I will post my favorites in a future post.


Ashley

Saturday, August 25, 2012

Junky Fix: Neon Statment Chain Link Necklace DIY

We all know that accessories can make or break an outfit. My rule of thumb is to concentrate on a statement piece to pull my outfits together. Whether its just for casual wear or to dress up for the night there is always room for a chunky piece of jewelry. The focus of this DIY is to create a neon chain link necklace that can be worn casually. For the past couple of seasons I have been feaning for anything neon; from shoes to blazers I have a little bit of everything in my closet. Why not add one more neon "essential" to my wardrobe? So, if you are in search of a Junky Fix for a Neon Color Craving, follow these steps........


Junkie Fix: Neon Statment Chain Link Necklace DIY


Things you will need:

Necklace (silver)-$2.99
Spray paint of any color of choice-$4.29
Clear fingernail polish-$7.79
60 minutes of DIY time- $FREE.99

Step 1: I started out with a silver chunky chain necklace that was purchased while on a thrifting adventure.


Step 2: I purchased a small can of neon (close to yellow) color spray paint. The spray paint was purchased from my local craft store, Ben Franklin Crafts (any craft store with spray paint will do). I chose one size of the necklace to spray paint. I took the necklace and spray paint outside and held the can roughly 12 inches away from the necklace. If sprayed close to the object, the paint will run. 

Krylon Short Cuts Spray paint

Step 3: I sprayed the paint approximately 12 inches from the necklace on both sides. I found it easier to lay the necklace down on a flat surface to spray one side, then flipped on the opposite side. I let it each side dry for 15 minutes. Then I put a second coat of spray paint on both sides. 

How to make a necklace, neon necklace, DIY

Step 4: I let the necklace dry for about one hour. Then, I started thinking of my next project, so time flew by!!

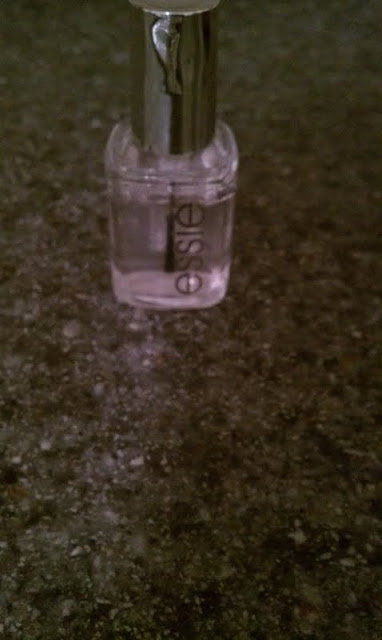
Step 5: After letting the necklace dry, I used my Essie Clear Fingernail Polish to polish over the spray painted area of the necklace. This sealed in the color and left a glossy finish.


Step 6: After coating the necklace. I let the entire necklace dry for another 30 minutes. After the polish dried, THIS WAS THE ENDING RESULT!!!!!!!!!!!


I added another chunky chain to for a layered look


TADAAAA!!!!!


I hope this has sparked some ideas. Chose any color and make a necklace, bracelet, etc. Its endless!!!!!!! Let us know how your DIY turns out!!!